How To Build a QR Code Generator App Using Vanilla JavaScript
Learn the Essentials of JavaScript in Just One Project
Introduction
QR (Quick Response) code is a machine-readable matrix-type barcode that has become a mainstream connection method and a quick and efficient way to share information, especially with smartphone devices. Creating a customized QR code generator application can be an inspiring and practical project for you if you're looking to improve your JavaScript skills.
In this tutorial, I'll guide you through a step-by-step process of building a QR code generator app using vanilla JavaScript, ensuring you understand the core concepts without relying on any JavaScript libraries or frameworks.
Prerequisite
To successfully follow through with this project, a foundational knowledge of HTML, CSS, and JavaScript is imperative. If you are unfamiliar with any of these web tools, consider reviewing introductory materials for HTML, CSS, and JavaScript before proceeding with this tutorial. A good resource to explore would be W3Schools, or you can choose any excellent tutorial on YouTube.
Before we begin, I'd like to give a shout-out to Traversy Media, from whom I initially learned how to code this app. I decided to create a tutorial on it because I couldn't find any detailed tutorials available.
The Project Demo

Before we delve into the development process, let's explore how our application would function:
First, you input the URL of any website of your choice (e.g., the URL of a restaurant).
Next, select the preferred QR code image size.
Then, generate the QR code.
You can opt to scan the QR code with your smartphone or any other device, or download the image to your device and print it out later.
Setting Up the Project
In this tutorial, we'll be using HTML (for the page structure), Tailwind CSS (for styling), and vanilla JavaScript (to apply behavioural logic) for our application. I'll be using the VS Code editor for this tutorial alongside the Live Server extension to preview the application in real-time.
Please follow the steps below to set up the project:
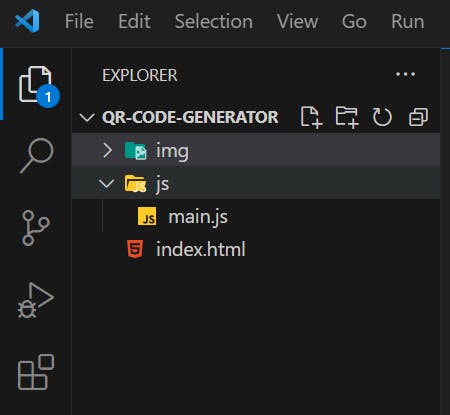
Create a folder and name it whatever you like. In this case, it will be
qr-code-generator.Create the
index.htmlfile that will contain the skeleton and markup of our application.Create a JavaScript file —
main.jsor whatever you decide to name it, and put it inside the folder you created.Create an "images" folder that will contain the images.
If you did everything right, you should have something that looks like the one below 👇👇
Now, let's get into the interesting part — the code 😍
The HTML Structure
First, generate the HMTL boilerplate.
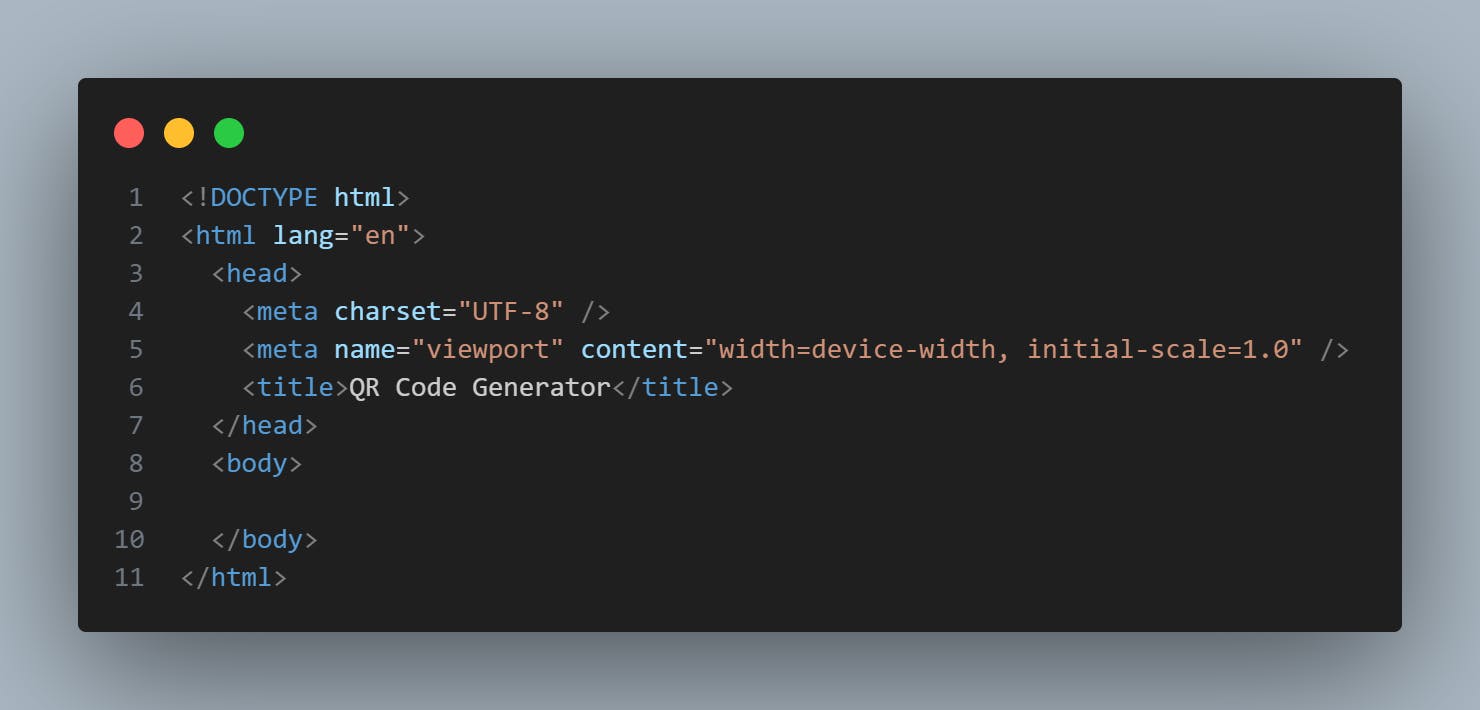
Next, link the main.js to the index.html file using the <script> tag:
<!DOCTYPE html>
<html lang="en">
  <head>
    <meta charset="UTF-8" />
    <meta name="viewport" content="width=device-width, initial-scale=1.0" />
    <!-- add the `main.js` here -->
    <script src="js/main.js" defer></script>
    <title>QR Code Generator</title>
  </head>
  <body></body>
</html>
You'll notice I added the defer keyword to the <script> tag. The purpose is to ensure that the JavaScript code only runs after the page has been loaded and parsed, so it can't slow down the initial page load. Always include the defer if you added your JavaScript to the <head> tag of your HTML file.
Add The Tailwind CSS
As mentioned earlier, we're incorporating Tailwind CSS into this project. There are various methods to install Tailwind into your project. To learn more, refer to the official Tailwind CSS documentation.
For this tutorial, we'll include Tailwind CSS using the CDN. The CDN allows us to add the script tag to the <head> of our HTML file, enabling us to immediately use Tailwind's utility classes to style our application.
Here's the Tailwind CSS script, which includes:
<!DOCTYPE html>
<html lang="en">
  <head>
    <meta charset="UTF-8" />
    <meta name="viewport" content="width=device-width, initial-scale=1.0" />
    <!-- add the `main.js` here -->
    <script src="js/main.js" defer></script>
    <!-- add the Tailwind CSS CDN here -->
    <script src="https://cdn.tailwindcss.com"></script>
    <title>QR Code Generator</title>
  </head>
  <body></body>
</html>
Add The QR Code Library
To add the QR code library and generate QR code objects, you can use cdnjs, a free and open-source CDN service powered by Cloudflare. Follow these steps:
Visit cdnjs.com.
In the search bar, type "qrcodejs" and select the first option.
Copy the script tag provided for the selected library.
Now, you can paste the copied script tag into the <head> of your HTML file to integrate the QR code library into your project. This will enable you to efficiently create QR code objects for your application.
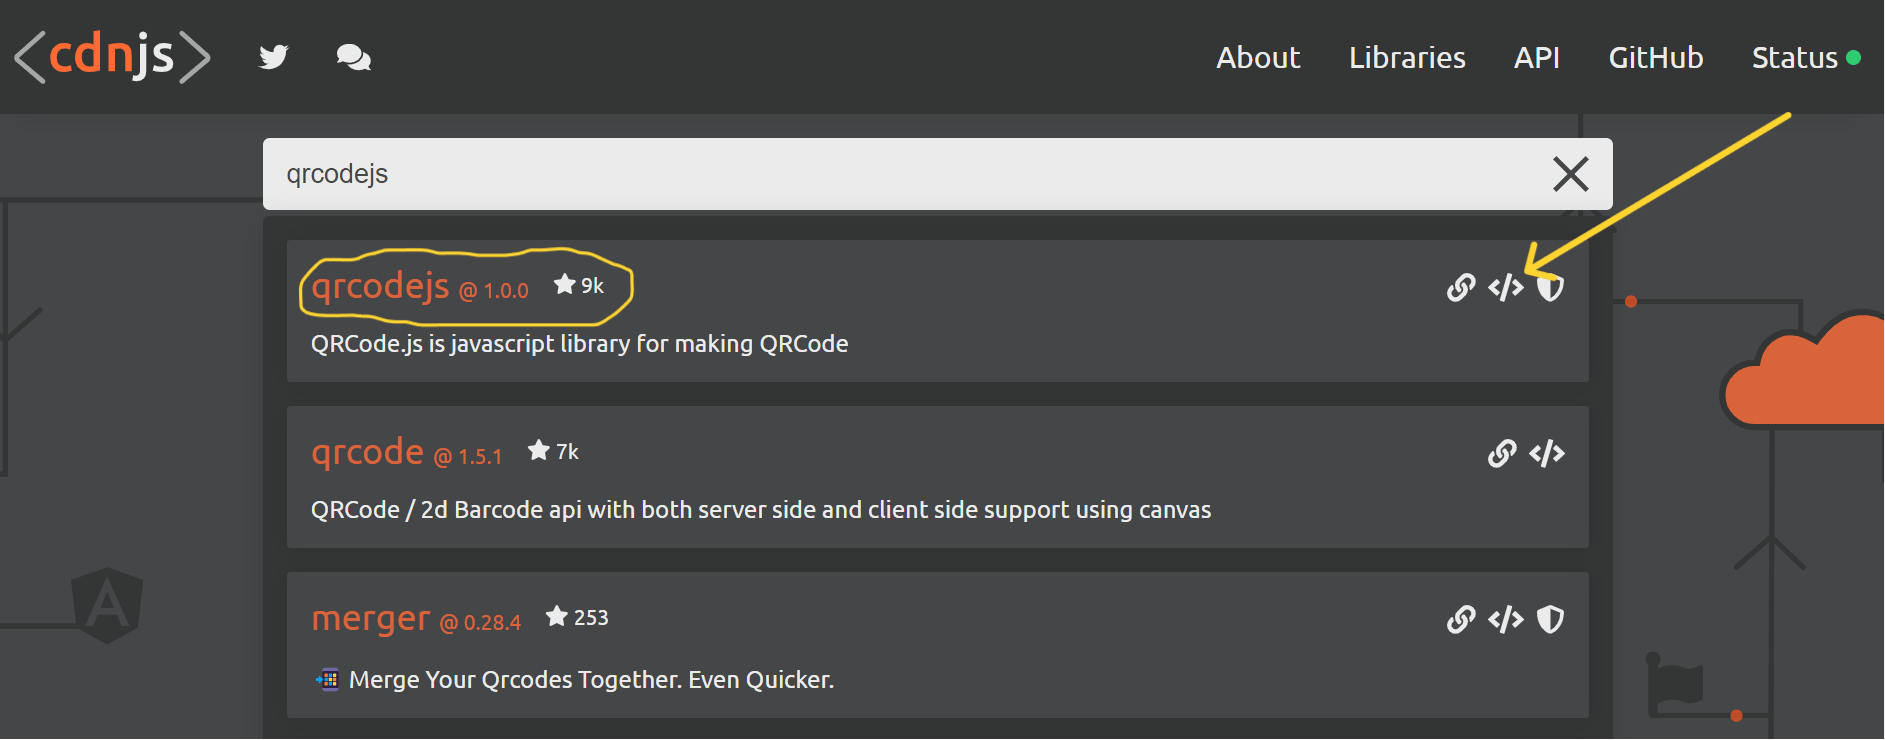
Here's how our code will look with the QR code script added:
<!DOCTYPE html>
<html lang="en">
  <head>
    <meta charset="UTF-8" />
    <meta name="viewport" content="width=device-width, initial-scale=1.0" />
    <!-- add the `main.js` here -->
    <script src="js/main.js" defer></script>
    <!-- add the Tailwind CSS CDN here -->
    <script src="https://cdn.tailwindcss.com"></script>
    <!-- Here's the QR code script -->
    <script
      src="https://cdnjs.cloudflare.com/ajax/libs/qrcodejs/1.0.0/qrcode.min.js"
      integrity="sha512-CNgIRecGo7nphbeZ04Sc13ka07paqdeTu0WR1IM4kNcpmBAUSHSQX0FslNhTDadL4O5SAGapGt4FodqL8My0mA=="
      crossorigin="anonymous"
      referrerpolicy="no-referrer"
    ></script>
    <title>QR Code Generator</title>
  </head>
  <body></body>
</html>
Now, you can utilize the QR code library in your project. With the inclusion of Tailwind CSS and the QR code library through the specified dependencies, your project is set up and ready for development.
Designing the User Interface
The user interface (UI) or layout of our project is straightforward, consisting of two main sections:
Header:
The header is kept minimal, featuring only a title and a few styling codes. Here's the code for the header:
    <!-- The Header Section -->
    <header class="p-4 mb-10 bg-[#008000]">
      <div class="max-w-5xl m-auto">
        <div class="text-xl font-bold text-white">QR Code Generator</div>
      </div>
    </header>
Notice that I used semantic HTML. That's always a good practice.
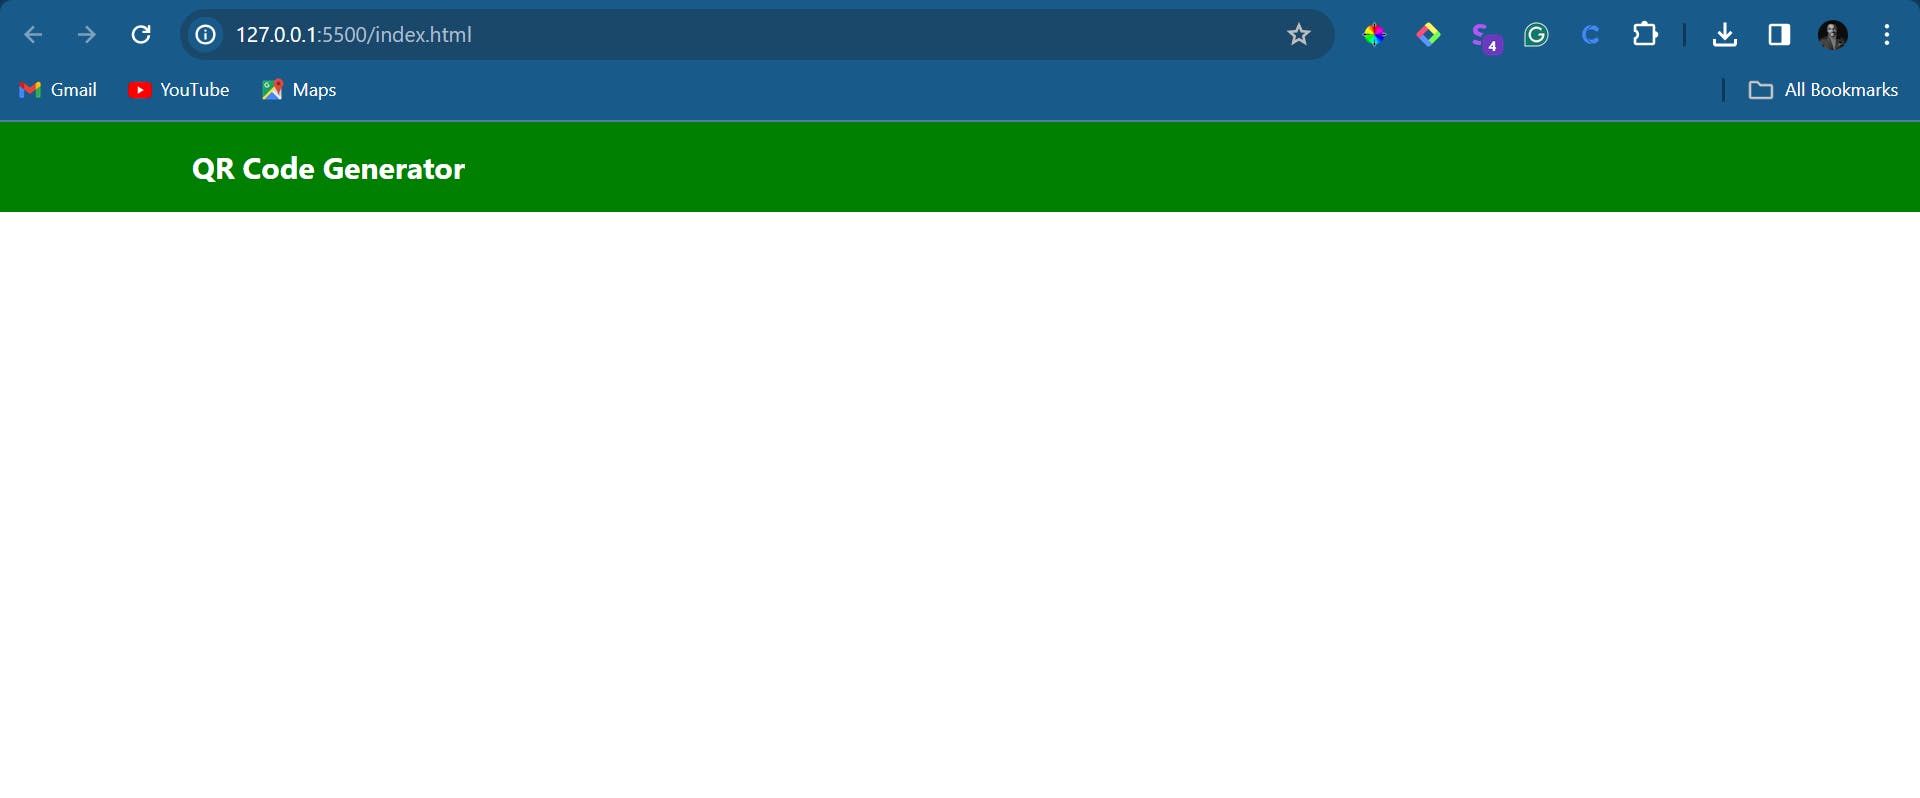
See how it looks in the browser:
Next, let's focus on the main section.
The Main Section:
This section will consist of two columns:
The first column will include the heading, paragraph, and the form.
The second column will solely feature the image.
Before delving into these elements, let's apply styling to the main section and ensure responsiveness. Again, I'm assuming you are familiar with Tailwind CSS.
Please incorporate the following code 👇 directly under the header tag.
    <!-- The Main Section -->
    <main
      class="flex flex-col-reverse align-center justify-center m-auto md:max-w-4xl p-10 md:flex-row"
    ></main>
A). Heading, Paragraph, and the Form
For this part, kindly copy the code below and add it to your index.html inside the <main> tag.
<div class="w-full md:w-2/3 mr-24">
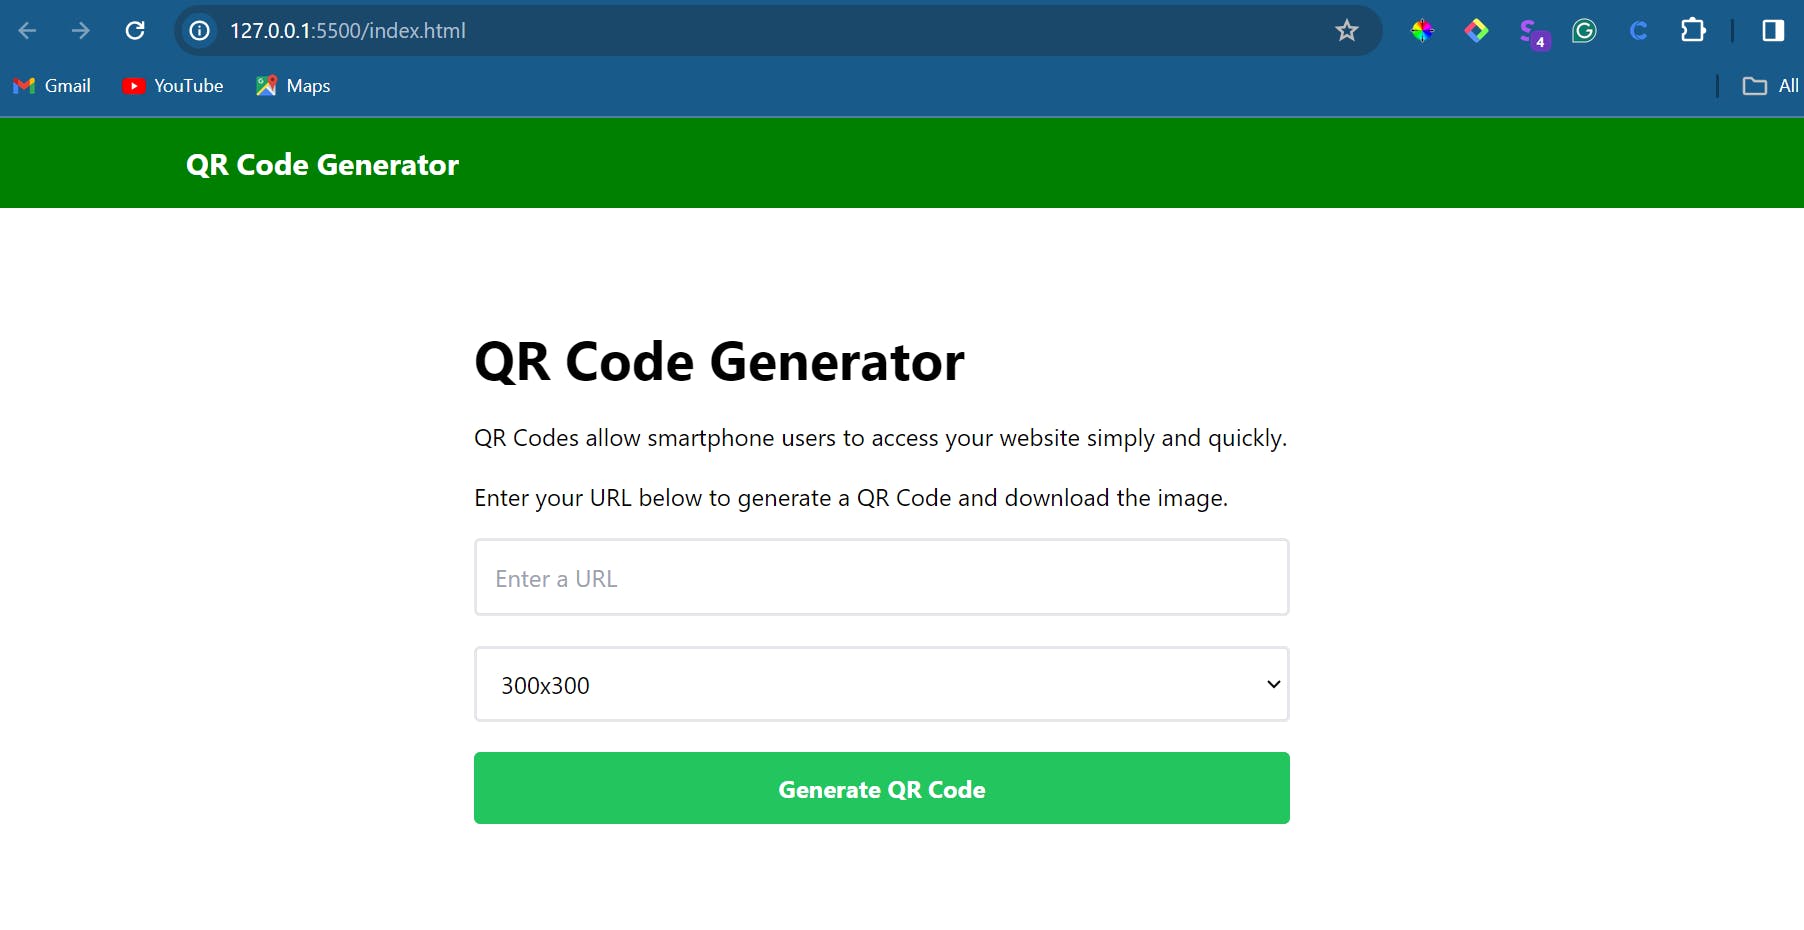
        <h1 class="text-3xl font-bold mb-5 md:text-4xl">QR Code Generator</h1>
        <p class="mb-4">
          QR Codes allow smartphone users to access your website simply and
          quickly.
        </p>
        <p>
          Enter your URL below to generate a QR Code and download the image.
        </p>

        <form id="generate-form" class="mt-4">
          <input
            id="url"
            type="url"
            placeholder="Enter a URL"
            class="w-full border-2 border-gray-200 rounded p-3 text-grey-dark mr-2 focus:outline-none mb-5"
            required
          />

          <select
            class="w-full border-2 border-gray-200 rounded p-3 text-grey-dark mr-2 focus:outline-none"
            name="size"
            id="size"
          >
            <option value="100">100x100</option>
            <option value="200">200x200</option>
            <option value="300" selected>300x300</option>
            <option value="400">400x400</option>
            <option value="500">500x500</option>
            <option value="600">600x600</option>
            <option value="700">700x700</option>
          </select>
          <button
            class="bg-gray-600 rounded w-full text-white py-3 px-4 mt-5 hover:bg-black"
            type="submit"
          >
            Generate QR Code
          </button>
        </form>
      </div>
Our project is gradually taking shape, and we're making steady progress.
Take a look 👇
B). Image Column
This column is quite simple. Depending on what you named your image in the 'image' folder you created above. For this project, it is named 'qr-code'. Here's the code to add it to the layout:
 <!-- Image Column -->
      <div class="w-full md:w-1/3 self-center">
        <img
          class="w-1/2 m-auto mb-10 md:w-full rounded-md"
          src="img/qr_code.svg"
          alt="The QR Code Image"
        />
      </div>
If you have done everything correctly, your app should look like this one 👇👇
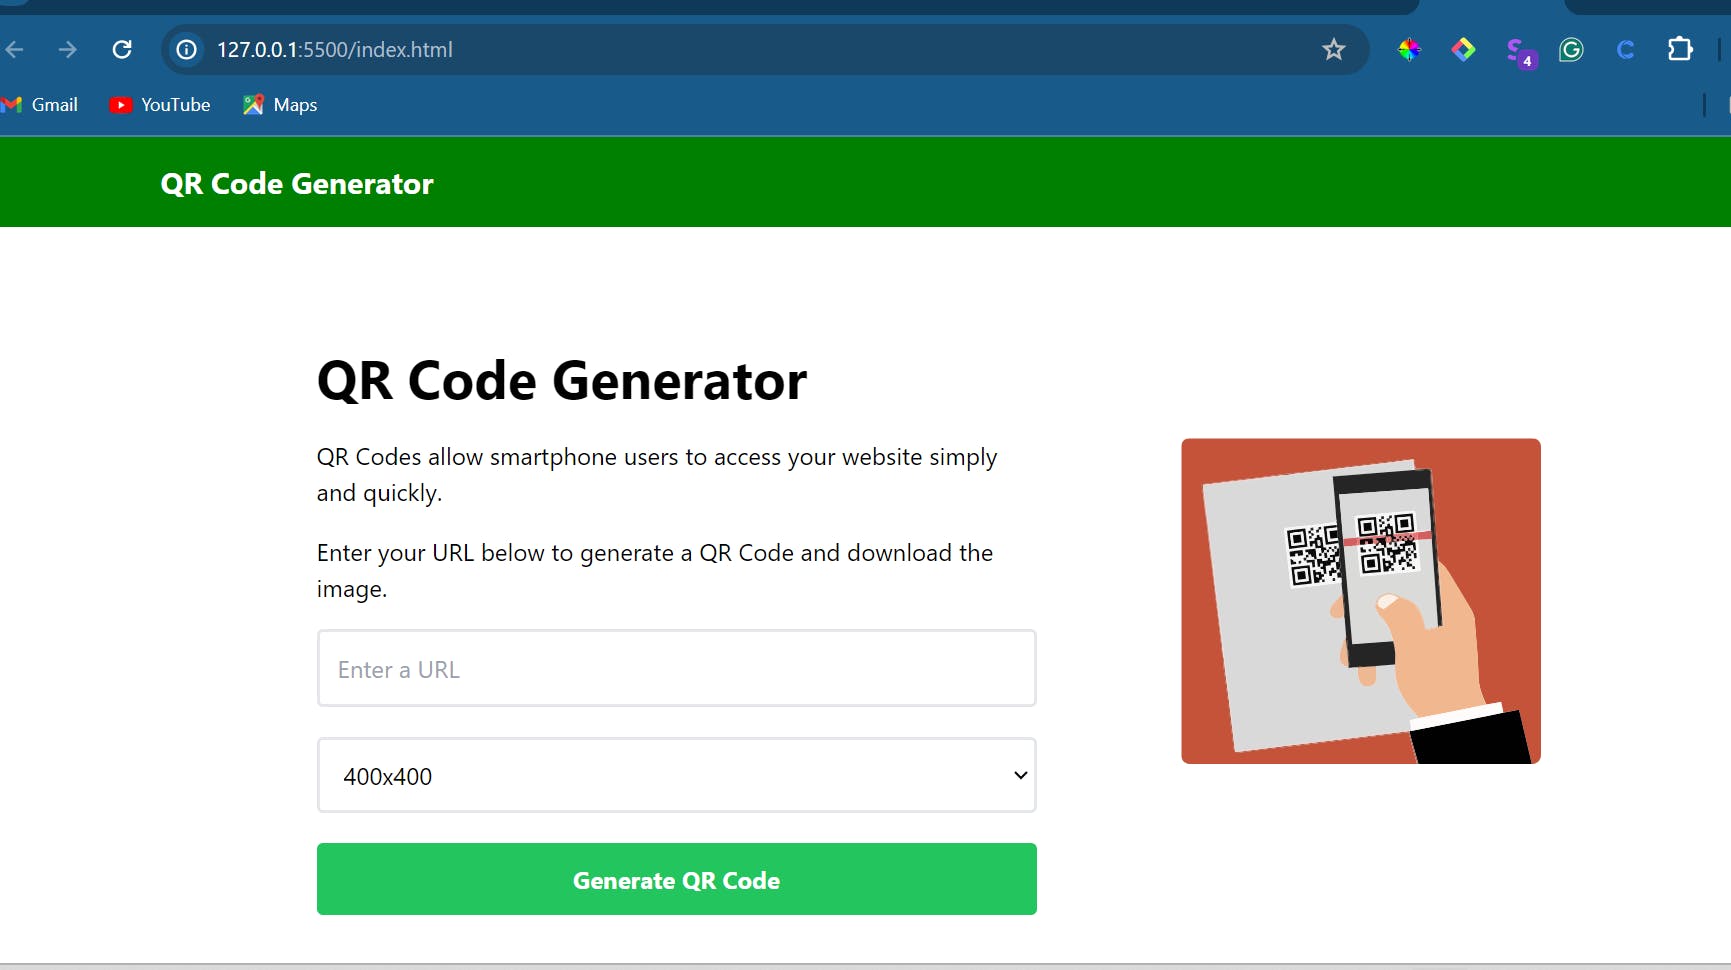
The amazing feature of Tailwind CSS is that it lets you make your application responsive. If you check, our application is very responsive with just a few lines of code.
The next thing in our layout will be the section for the generated QR code.
Generated QR Code Section
This section will be directly after the main section and will contain two items: a spinner and the QR code output.
First, let's add the general styling of the generated QR code section. Add the code under the <main> tag:
<div
      id="generated"
      class="max-w-5xl m-auto flex flex-col text-center align-center justify-center mt-20"
    ></div>
The id="generated" will be used much later in the JavaScript logic.
Let's add other parts.
The Spinner and QR Code Output
The spinner is going to be an SVG. I will just paste it below so you can copy, adjust, and use it. The QR code output is simple, as you'll see in the code below:
<!-- Spinner -->
      <div id="spinner" role="status">
        <svg
          class="inline mr-2 w-24 h-24 text-green-400 animate-spin dark:text-green-600 fill-gray-600"
          viewBox="0 0 100 101"
          fill="none"
          xmlns="http://www.w3.org/2000/svg"
        >
          <path
            d="M100 50.5908C100 78.2051 77.6142 100.591 50 100.591C22.3858 100.591 0 78.2051 0 50.5908C0 22.9766 22.3858 0.59082 50 0.59082C77.6142 0.59082 100 22.9766 100 50.5908ZM9.08144 50.5908C9.08144 73.1895 27.4013 91.5094 50 91.5094C72.5987 91.5094 90.9186 73.1895 90.9186 50.5908C90.9186 27.9921 72.5987 9.67226 50 9.67226C27.4013 9.67226 9.08144 27.9921 9.08144 50.5908Z"
            fill="currentColor"
          />
          <path
            d="M93.9676 39.0409C96.393 38.4038 97.8624 35.9116 97.0079 33.5539C95.2932 28.8227 92.871 24.3692 89.8167 20.348C85.8452 15.1192 80.8826 10.7238 75.2124 7.41289C69.5422 4.10194 63.2754 1.94025 56.7698 1.05124C51.7666 0.367541 46.6976 0.446843 41.7345 1.27873C39.2613 1.69328 37.813 4.19778 38.4501 6.62326C39.0873 9.04874 41.5694 10.4717 44.0505 10.1071C47.8511 9.54855 51.7191 9.52689 55.5402 10.0491C60.8642 10.7766 65.9928 12.5457 70.6331 15.2552C75.2735 17.9648 79.3347 21.5619 82.5849 25.841C84.9175 28.9121 86.7997 32.2913 88.1811 35.8758C89.083 38.2158 91.5421 39.6781 93.9676 39.0409Z"
            fill="currentFill"
          />
        </svg>
        <span class="sr-only">Loading...</span>
      </div>
      <!-- QR Code Output -->
      <div id="qrcode" class="m-auto"></div>
You can change the colour of the spinner by adding the colour of your choice.
Now, upon inspecting your project, you will discover that the spinner is spinning by default. However, this is not the desired behaviour, so let's rectify that. Copy the code below and insert it into the <head> tag to eliminate the default spinner:
    <style>
      #spinner {
        display: none;
      }
    </style>
Woohoo! 🎉🎉 We're ready for JavaScript. Let's dive in!
Adding the App Logic
Our application has a straightforward algorithm. Understanding the algorithm will help us write efficient logic to make the app behave as expected.
Below is a simple algorithm for the QR code generator app:
Start the application
Accept user input for the data to be encoded in the QR code (in this case, the URL of any website).
Validate the input data to ensure it meets the requirements for QR code encoding.
Generate a QR code using a QR code generation library
Display the generated QR code for the user.
Provide options for the user to download the QR code image and print it for scanning much later.
End
To get started, let's set up the basics.
const form = document.getElementById("generate-form");
const qr = document.getElementById("qrcode");

// Button submit
const onGenerateSubmit = (e) => {
  e.preventDefault();

  const url = document.getElementById("url").value;
  const size = document.getElementById("size").value;
};

form.addEventListener("submit", onGenerateSubmit);
A few things to note in the code above:
The first two lines of code use
document.getElementByIdto select the form and QR code elements from the HTML document, respectively.We declare a constant variable named
onGenerateSubmitand assign it an arrow function. The function takes an eventeas a parameter.The
e.preventDefault()function helps prevent the default behaviour of form submission, which is to reload the page. This is commonly done in JavaScript when handling form submissions to manage the logic without a page reload.The
const urlandconst sizeextract and store the values from input fields with the IDs "url" and "size," respectively.form.addEventListener("submit", onGenerateSubmit);adds an event listener to the form element (generate-form). It listens for the "submit" event, and when the form is submitted, it calls theonGenerateSubmitfunction. TheonGenerateSubmitfunction is executed, preventing the default form submission behaviour and capturing the values of the URL and size input fields.
Add Validation to the App
This is the point where the application's magic unfolds. Here, our goal is to ensure that the app behaves in specific ways based on the actions taken.
Before incorporating validation, we must write the logic that will accomplish the following:
Generate the QR code
Display and hide the spinner
Create a download button
Clear the QR code after its initial creation
Now, let's delve into the process!
1. Generate QR Code
We will begin by writing the logic for generating the QR code. Copy the lines of code provided below and insert them outside the onGenerateSubmit function.
// Generate QR code
const generateQRCode = (url, size) => {
  const qrcode = new QRCode("qrcode", {
    text: url,
    width: size,
    height: size,
  });
};
If you want to modify the QR code image, you can draw insight from QRCode.js.
2. Display the spinner
// Display the spinner
const showSpinner = () => {
  document.getElementById("spinner").style.display = "block";
};
3. Hide the spinner
// Hide the spinner
const hideSpinner = () => {
  document.getElementById("spinner").style.display = "none";
};
4. Create a download button
// Create download button to download QR code as image
const createDownloadBtn = (downloadUrl) => {
  const link = document.createElement("a");
  link.id = "download-link";
  link.classList =
    "bg-green-500 hover:bg-green-600 text-white font-bold py-2 rounded w-1/3 m-auto my-5";

  link.href = downloadUrl;
  link.download = "qrcode.png";
  link.innerHTML = "Download Image";

  document.getElementById("generated").appendChild(link);
};
5. Clear the QR code after its initial creation
// Clear QR code and download button
const clearUI = () => {
  qr.innerHTML = "";
  const downloadBtn = document.getElementById("download-link");
  if (downloadBtn) {
    downloadBtn.remove();
  }
};
In the code above, we added a logic to also clear the generated QR code before generating another one. You can run the app without the code to observe what I'm talking about.
Next, let's add the validation code:
// Validate url
  if (url === "") {
    alert("Please enter a URL");
  } else {
    showSpinner();
    // Show spinner for 1 sec
    setTimeout(() => {
      hideSpinner();
      generateQRCode(url, size);

      setTimeout(() => {
        const downloadUrl = qr.querySelector("img").src;
        createDownloadBtn(downloadUrl);
      }, 50);
    }, 1000);
  }
};
The setTimeout function is used to introduce delays in the execution of the various actions. This is to create a sequential flow in the user interface and provide visual feedback through the spinner.
For the complete code of the application, you can review the GitHub repository here.
Here's our application working as expected 😍😍

There you go! 🎉 Congratulations! 🥳
Task for You: Give More Features to the App
Alright, so you have learned how to build a QR code generator app using HTML, Tailwind CSS, and vanilla JavaScript. Let's take it one level further. Here is a task for you to complete:
1. QR Code Scanning:
- Integrate a QR code scanner using the device's camera to allow users to scan QR codes and retrieve information.
2. Customization Options:
Allow users to customize the colour of the QR code.
Provide options to add a logo or image overlay to the QR code.
Allow users to choose different error correction levels.
3. Analytics Integration:
- Implement tracking and analytics for generated QR codes, allowing users to see how many times a QR code has been scanned.
Conclusion
We have successfully crafted a QR Code Generator App using HTML, Tailwind CSS, and vanilla JavaScript. Throughout the tutorial, we covered setting up the project, designing a user-friendly interface, and implementing the logic for QR code generation.
As you reflect on your lessons from this project, remember that continuous learning is the key to mastering any programming language. Explore additional features, customize the app, or even consider integrating advanced functionalities.
Happy coding! 🚀👩💻
Reference Video Tutorial 👇👇
Here's the link to the tutorial video by Traversy Media.

